
Now that Julie has taught you how to make your steampunk costume and you’re looking sharp, it’s time to add those finishing touches. I’m Bethany Whitehead, Co-Programs Coordinator, and today we’re going to talk about one of the quintessential steampunk accessories: The Jetpack.
While researching this project, I came across many photos and videos on how to make a steampunk jetpack so there’s plenty of inspiration out there for you. What I chose to do is a kid-friendly jetpack using inexpensive materials and items you can grab from your recycling bin. This is great craft to do with the younger steampunk enthusiasts, but you could easily elevate it to a more polished, adult jetpack. Really, your creativity and imagination is the only limit.
The first step will be gathering your materials. For me that meant two 2-liter soda bottles, a shoe box, a child’s backpack I picked up at a second-hand store, a few sheets of craft foam in steampunk colors, sheets of colored felt, some gears, copper wire in two colors, a plastic bag, copper spray paint, craft paint in a few different colors, and my handy dandy glue gun.

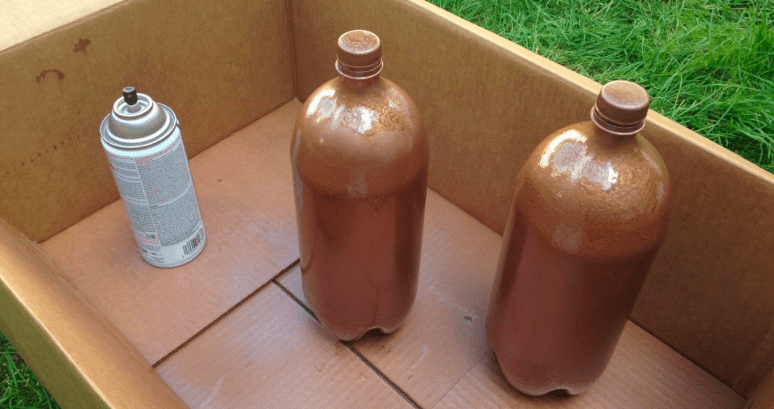
I took my soda bottles and shoe box outside to spray paint them. The paint should have instructions on the can. Be sure to follow all safety instructions the manufacture recommends and note the drying time. The paint I chose took about 24 hours to completely dry. I applied a few coats until I reached the desired opacity.
While the paint dried, I had time to work on the decorative elements. I decided I wanted to have a vent, a couple fuel gauges, a mechanics window with gears, and I used the packs from my dog’s heartworm medication for some buttons. For the vent, I drew out the basic shape I wanted and cut it out of black foam. I then traced and cut out the same shape out of the grey foam. Using a knife, I cut out strips of the gray foam to create that vent feel. The gear window was very similar: cut a square out of both black and gray foam then cut the center out of the gray square. I glued some gears onto the black foam and plastic onto the gray square before gluing the two pieces together. Both the vent and the window got a coat of silver paint. I used dimensional paint most often used for T-shirts in the same silver to add grommets.

The gauges were a little trickier. I traced four circles. Two I used for the gauge face which I painted black then coated with silver paint. I drew on the fuel gauge and the arrow to indicate fuel level. The other two circles, I cut the centers out of and glued plastic to the back to act as a window. I then cut a rectangular strip for each gauge to serve as the sides. After gluing all three pieces together, it got a heavy coat of gold paint. The dog medication packs were painted on the inside of the packs which will help protect the paint from scraping off.
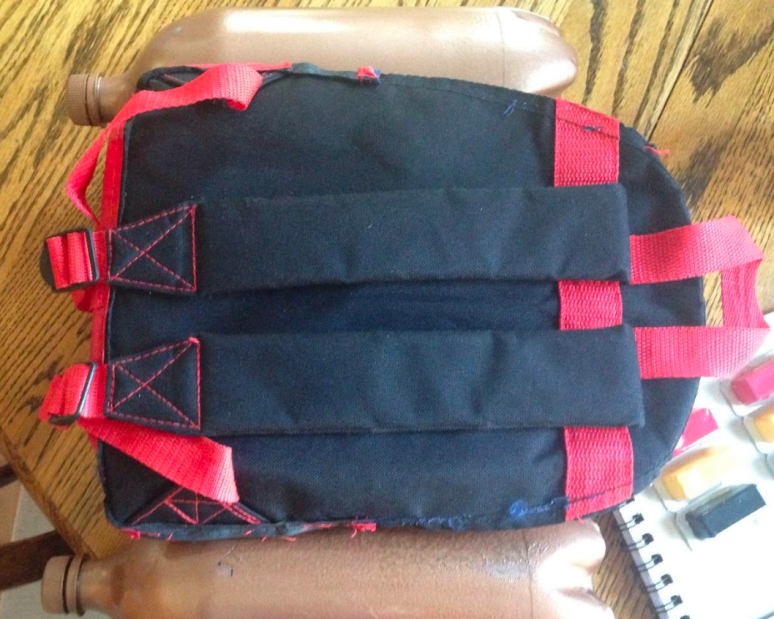
While the paint on my decorations dried, I disassembled the backpack. I only wanted the back panel with the straps attached. To do this, you could either cut the backpack or use a seam ripper to rip. Be careful here and make sure you don’t just the straps. This back panel is what’s going to allow you to wear the jet pack.
Now that most of the prep work is done, it’s time to assemble! I first glued the shoe box lid to the box itself. You’ll want to lid so you have somewhere to attach the backpack panel. Speaking of that panel, I glued that to the top of the shoe box lid. I got lucky that the box and the backpack were a similar size. I wrapped the extra inches on the sides over. If the size of the box you use is much narrower than your backpack, you may not want to do this. With the box and backpack panel attached, I attached the soda bottles. I glued them cap-down with my initial intention being to use the felt to cut out flames to glue to the cap. In the end, I decided not to do that, but I still think it would be a fun detail for a child’s jetpack.
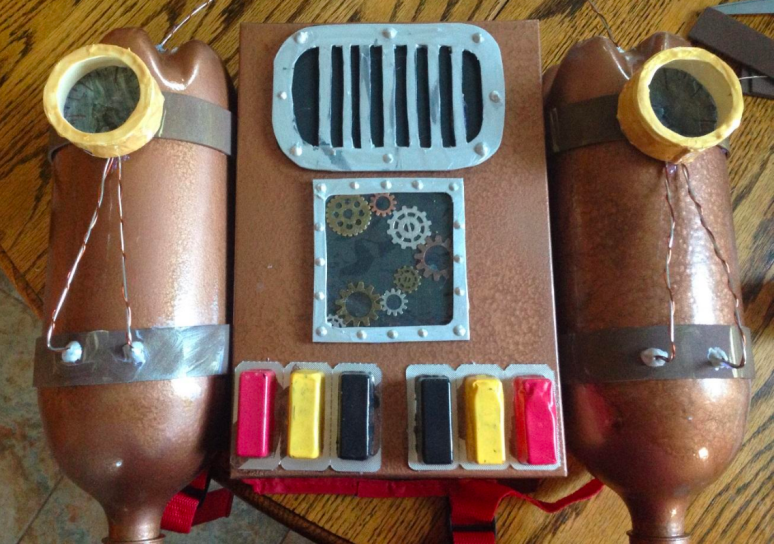
With the major components securely glued together, it’s time to decide on where all those decorations are going. It took me some time of playing with it before I finally decided where I wanted everything to go. At this point, I also decided I wanted to add some strips to the bottles, or fuel canisters now. I cut 1 inch strips out of my brown foam long enough to wrap around the bottles and glued 2 strips around each. I used some gold paint on a paper towel to give a slight shimmer to the strips so they didn’t look quite so much like foam. On top of the strips went my gauges. The Vent went center on the top with the gear window right below. The bottoms were glued on the bottom to finish it off.
I then remembered I had that wire. I wrapped the copper and silver colored wire around each other and cut 4 lengths. I attached two to each fuel gauge, bent the bottoms at right angles to the canisters, and put a generous glob of hot glue which I painted silver to look a little like solder. I then took the remaining wire and, with even more hot glue, connected the center tops of each canister with the wire.
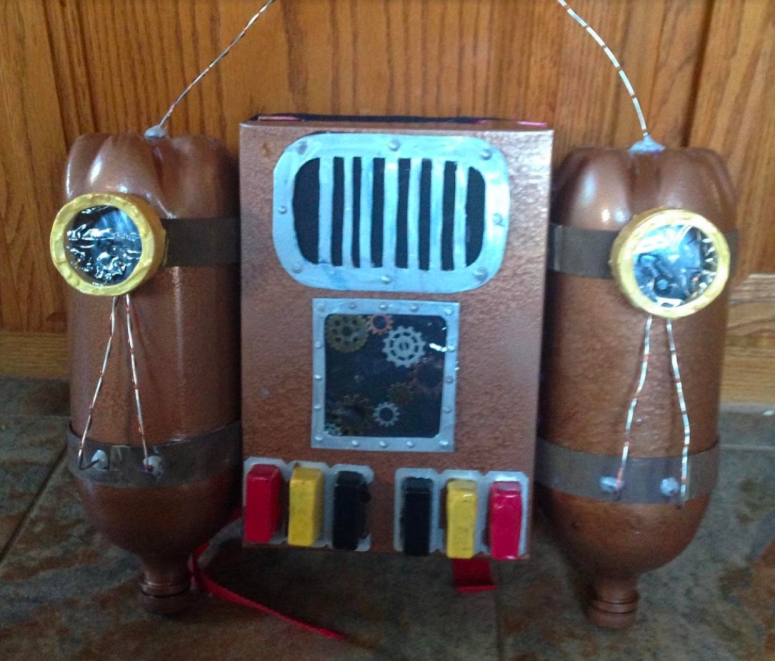
You can keep going and add more paint, more detail, the felt flames out the caps, and anything else you want. For me though, this was my finishing point. My niece is going to love wearing this at the Festival, and maybe even for Halloween!

One thought on “Steampunk Front to Back: DIY Jetpack”