
So I hear you want to make a steampunk weapon! You’ve come to the right place. It’s really not very difficult at all, even if you have never done it before. Better yet, you can do it for quite cheap. You can also scale up the price and difficulty as much as you want, if you want to work on something really complicated.
This will be a multi-part series over the course of the week, going through every step. On the final post, I’ll have links to a number of different resources with more in-depth tutorials. If you’re interested in this topic, YouTube is your friend.
PART ONE: GETTING STARTED
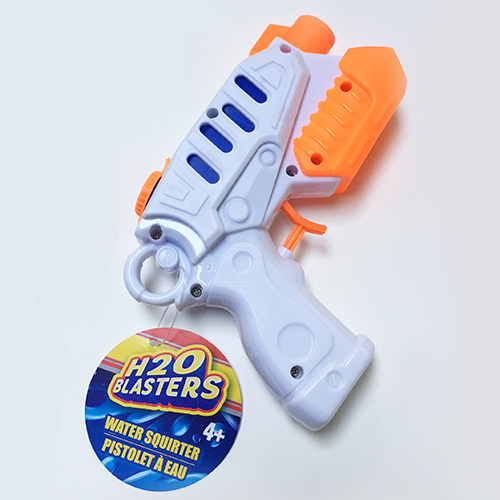
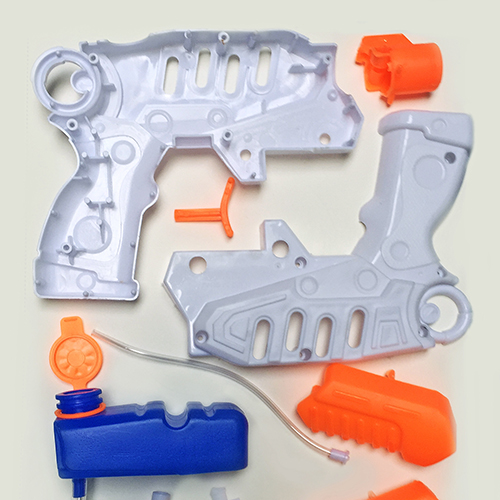
If you’ve never done this before, I’d recommend a trip to the dollar store (or local equivalent). At my local Dollar Tree, I found a selection of really cool looking squirt guns. Since they were just a buck each, I didn’t really care if I destroyed them in the process, which took the stress out of experimenting. If you can’t find anything at the dollar store, try a party supply store. A lot of times they’ll have kids’ birthday party favors that include packs of cheap guns.
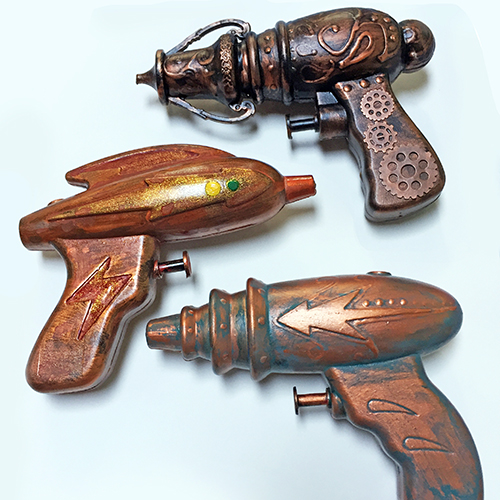
Once I felt I had my technique down, I bought a different gun for my main project.
Supplies:
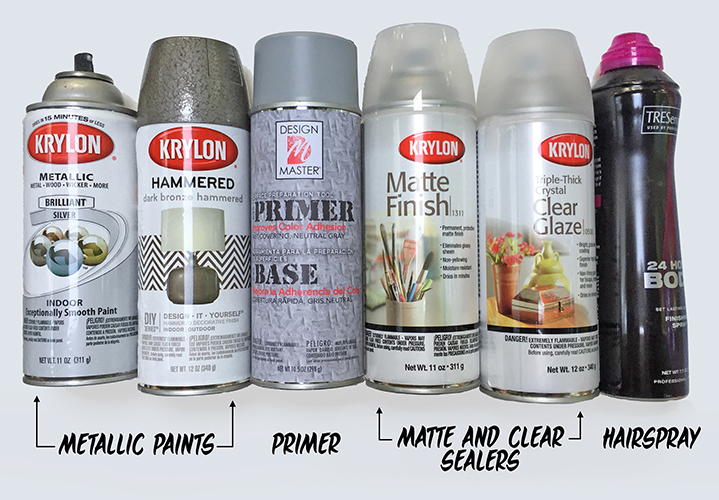
A primer. I bought a matte gray spray primer at Michaels for about $8, and used most of the can on these projects. The idea behind the primer is that it covers up the bright colored plastic so you don’t need to use as many coats of paint, and it also creates a matte surface that makes it easier for the paint to stick. You don’t technically need this if you want to avoid it, and you can probably get away with using any neutral colored spray paint if you want a cheaper option. Just be aware that they might chip or flake off.
Spray sealer or Mod Podge. When you’re all done with the gun, you’ll need to seal it so it doesn’t chip or smear. It’s up to you if you want a dull or glossy finish. I bought both so I could vary the textures. The spray sealers will run you around $10 each. Mod Podge is cheaper, but more time consuming to paint it on, and could leave brush strokes if you’re not careful.
OPTIONAL: Hairspray, for the hairspray painting technique (more on this later).
OPTIONAL: Metallic paint. You can get a little bottle of the stuff for just highlighting small areas of the gun, or get a spray can of it to do the whole thing. I bought a can of textured spray paint that was meant to look like hammered bronze, but I found the finish underwhelming. To be fair, I used it in hotter and more humid environment than the can recommended, so maybe that interfered with it.
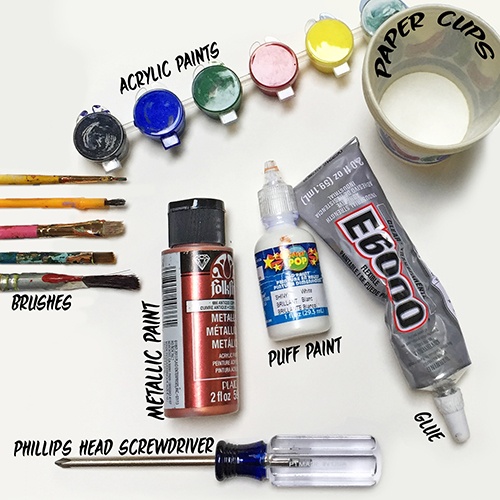
A screwdriver. If your gun has multiple parts to it, you’ll want to take it apart. You could just mask off the different sections with masking tape and newspaper, but it’s much easier if you can separate the pieces out and deal with them individually. The specific screwdriver needed will vary by gun, but if you’ve got a small Phillip’s head—my gun required a P1/2—it will probably fit most gun models.
Acrylic paint. This is something you can get for a couple bucks at Michaels, or really anywhere. Check out that dollar store again. It doesn’t need to be high quality paint. I recommend getting a small pack of primary colors, because then you can just mix them to get the colors you want.
Paintbrushes. You’ll want a medium size brush for most of the painting. Soft, so that it doesn’t leave brush strokes. You could also probably use a tiny brush for any tiny nooks and crannies, and a large, stiff bristled brush for dry brushing. More on that later.
A small bowl or paper cup for mixing paint
Water, for watering down paint
Paper towels for cleanup.
OPTIONAL: Fabric puff paint. I wanted to add designs to the gun before painting to make it look like the metal was embossed. It worked pretty well, although it proved hard to paint over with a brush, so I’d recommend doing this before even priming the gun. You also could probably use a hot glue gun if you have one and also have the fine motor control to make the glue go exactly where you want it.
OPTIONAL: Beads and gears and buttons and other things. Steampunk is big right now, and it’s very easy to find steampunky gears and clock faces at Michaels and probably other craft stores. Check out the scrapbooking and jewelry-making sections.
STEPS:
- If your gun has moving parts to it, you’ll want to unscrew it and take it apart. Make sure to check if the screws are all the same, or if the gun has special screws for certain parts of the gun! I didn’t do this, and when it came to putting the gun back together, I had to spend some time figuring out what went where. Separate out the different screws. If you’re really organized, package each set of screws in a sandwich bag and label it with masking tape.
- If you’re going to make any physical modifications to the gun, do those here. This might be as simple as cutting off bits you don’t like or sanding off those safety disclaimers that they emboss on the sides. Should I be encouraging you to remove safety disclaimers? I don’t know! I imagine it would depend on what you’re going to do with the gun when you’re done with it. Just be aware that when you get to the weathering part of the painting process, any surface imperfections or writing will be picked out and made very obvious, so get rid of those now. Or just beat up the gun! Scratch it up, gouge it, make it look like it’s seen some hard use.
- This is also where you might want to add things such as papier-mâché or paperclay, or any random bits and pieces you found around the house that might add visual interest to the piece. Glue these on now so that when you get through the priming and painting, they’ll look like original parts of the gun instead of late additions.
- If there are any parts of the gun you don’t want to get paint on—for example, lights or speakers or inner circuitry—mask those off with tape and newspaper now. Also, take note of what parts of the gun rub against each other, like the trigger. Even a tiny layer of paint can make the moving parts stick or scrape together, so you want to be careful getting paint on those.
Next up: painting

2 thoughts on “How to make Steampunk Weaponry”