
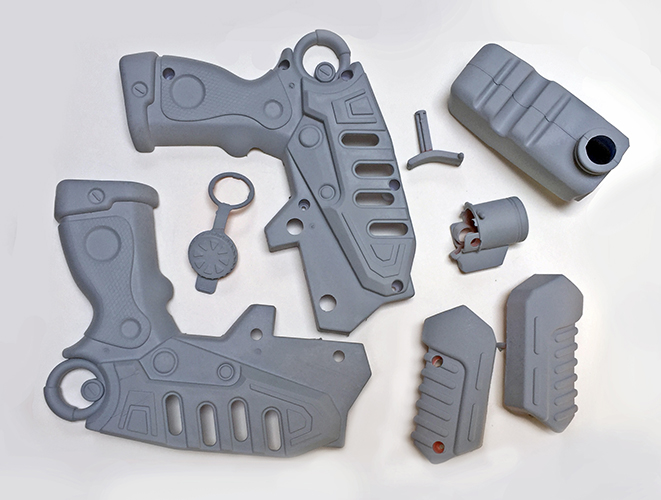
Welcome back! You’ve disassembled your gun and gotten it ready for painting. Now it’s time for the fun stuff.
PART TWO: PAINTING
Decide what your color scheme is going to be. I highly recommend varying the colors on the gun. It’s boring to have the whole gun end up one solid color. If you took the pieces apart, that’s a perfect opportunity to separate them into which ones you might want to be metallic, which ones are going to be a dark color, which ones might be a light color, etc. Don’t go too crazy, though—three to four different colors/finishes are probably the maximum you can do before the gun starts to look busy.
Prime the pieces. Make sure to put all the pieces on newspaper first, and do it in a well ventilated space if you’re using a spray primer. You’ll probably need a couple coats. If you can prop up the pieces on pencils or paper cups, you’ll avoid having it stick to the newspaper when it dries.
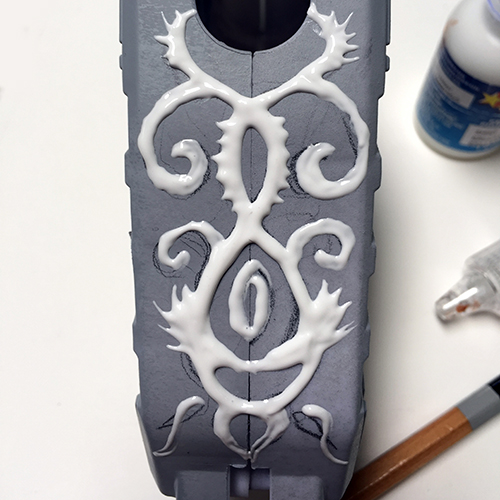
If you’re going to use the puff paint, do it here. You could do a layer of primer, then draw your designs with the puff paint, then do another layer. I bought white puff paint which turned out to be a mistake because it dries to a shiny finish which makes it hard to paint over and took many coats. If it had been a darker color, the poor coverage wouldn’t have been so obvious. The spray primer made it easier because the primer could settle onto the puff paint without being immediately smeared off by the brush, and the layer of primer made it much easier to paint over later.
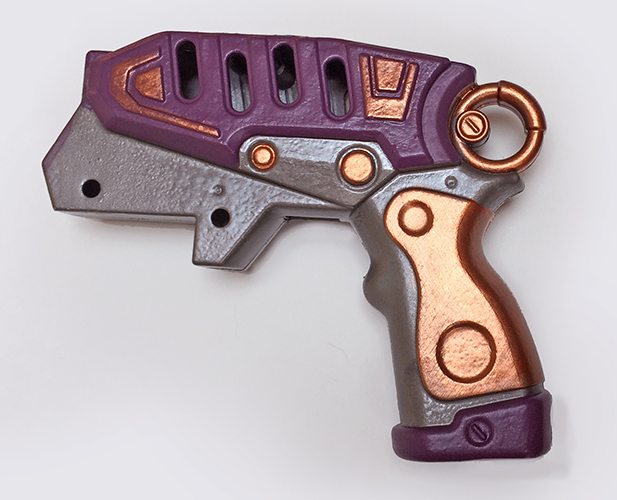
Now it’s time for the fun part: painting! You’re going to be painting everything with a medium color here. By medium, I mean something that’s not too dark and not too light. We’re going to be doing shadows and highlights later, so you want to make sure the base coat is around the middle of those. This is assuming, of course, that you want the gun to look weathered when you’re done. If you want your gun to look shiny and new, do whatever colors you want and skip the weathering steps later on.
If you have a couple bottles of nail polish laying around, you can use those for bright pops of color, or to add a glittery finish to things. You can get really cheap nail polish in the clearance sections of a lot of beauty supply stores like Ulta, and places like CVS and Walgreens often will have some for sale for only a dollar or two.
Next up: Weathering
