
PART THREE: WEATHERING
Your gun has been primed and painted and is looking pretty good. But we don’t want a good looking gun! This is steampunk. We want something that looks like it’s been around the block a few times. We want it to look like it’s covered in grime and engine grease and years of handling. This is where weathering comes in. Open up those acrylic paints again and get your black or dark brown out. Put some paint into your paper cup or whatever vessel you’re going to use to mix paint. Then add water, a drop at a time, until the paint is thin enough to flow easily into nooks and crannies.

With your paper towels at hand and working in small sections at a time, paint the black paint onto the gun, then wipe it lightly off. You want it to get into the cracks and creases of the gun and gather there. If the paint is drying too fast and you’re having trouble removing it in time, water it down a little more.
Start with a unobtrusive part of the gun, like maybe the bottom of the handle, so you can see whether your mixture of paint to water is correct before you commit to painting a more visible part of the gun.

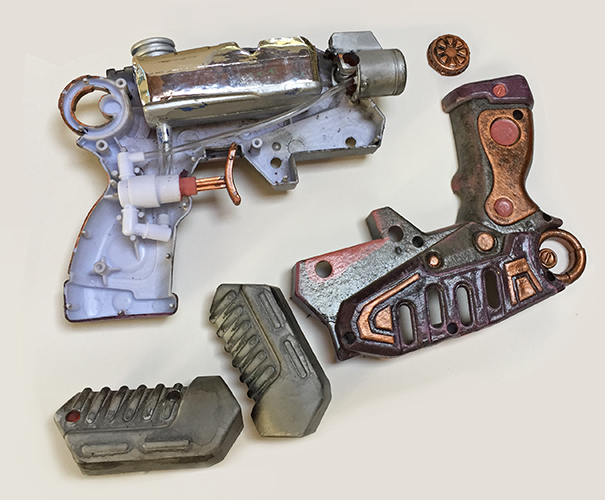
You don’t just need to use black paint for this. Use an orange-red for rust, or a blue-green for copper verdigris.
Ok, the gun is looking dark and gritty now. Maybe too dark? The thing about old, worn objects is that not only do the nooks and crannies collect dirt, any parts that stick out get well worn and shiny-smooth. Which means we need to add highlights to those. Get out those acrylic paints again and find or mix a color that’s close to the medium color you used to paint the gun, but a couple shades lighter. If you have a bright metallic paint, you could also use that. Spray paint isn’t going to work here, by the way, and you definitely don’t want to add water to this paint.
Taking your dry, stiff bristled brush, dip it in the paint, and then brush back and forth on a paper towel until you’ve taken nearly all of the paint off again. It’s important to do this for two reasons: 1: because it’s much easier to add more paint than remove it, and 2: because you don’t want to show brush strokes. Then lightly brush over the gun, catching the high points and edges. At first, you might not notice a difference, so keep building it up slowly until you like how it looks.
Time to seal this thing up! If your gun is in several pieces, and if you have both matte and glossy sealers, maybe you can experiment with mixing up the textures. Have some parts of the gun shiny, and some dull. You could also mask off sections with tape and prime sections of it individually. It’s true that worn, weathered guns are probably not going to have a diamond hard shine on them, but this is totally up to you. It’s your gun. Do what you want!
If you have any gears or other embellishments, you can add those on now. I use E6000 to glue stuff on, and it works well, although it dries shiny and is slightly flexible when dry, so you don’t want to use it for anything that is going to need a lot of support. If you don’t want the shiny glue to stand out against a matte gun, you can do this step before you prime it, to make sure it all looks cohesive.
Finally, remove all of the masking tape (check thoroughly for tape, folks. Don’t be like me and realize you left masking tape inside the gun after you screwed the whole thing back together). Reassemble the gun and test it to make sure it still works. Congratulations! You have a new steampunk gun!

Next up: The ill-fated hairspray technique, plus other resources
